Preparing for the Orchard
- MJ

- Mar 31
- 8 min read
Come along and join be while I turn my rocky hillside into an orchard! Permaculture and lazy gardening style!

My husband and my big dream for our property is to one day have a permaculture orchard! I have studied, practiced and worked for years to attempt to do this in the least distructive and natural way while putting all of my permaculture knowledge to the test. I am so excited to get started and I hope everyone follows along with me!
This is a 3-5-year project, depending on how everything goes. This year will be year one, so if I keep at this long enough and you all stick around to watch it that long we can go through this together!
Year 1
This year is all about research and soil modification.
To start I needed to see what we were working with. I knew the soil we would be starting from was not great. There isn't much growing there to begin with and it hasn't been used in a long time. At some point people were pasturing their horses there but not for long. I wanted to show everyone my method of observation in this post. So that you can see the thought process that goes into a set up.
In Permaculture we discuss small steps. I will showcase this in building this orchard. By making small steps, observing how those work and adapting for the next year, by the time we are ready to plant trees, we will have set everything up to thrive to the best of our ability. And in the long run saving time on inputs, money and resources.
In this blog post I will show you how to calculate grade, observe and acknowledge environmental conditions, soil testing methods and how I chose to start!
Contour Map and Grading


Contour maps help us to determine the elevation, or height, of our property over distance. They also help us to understand how water may flow on our property. The greater the drop of elevation the more and faster water will down. From these contour lines we can then find our grade and total area without needing a tape measure. We take the highest contour number and the lowest contour number to find out rise/height.
Below I will show you how to do the math. This will be helpful if you are unable to get to the site for whatever reason. If you don't want to do the math there are apps where you can lay your phone on the ground and it will tell you the grade/slope or websites to help you with the math. You can also use google maps to find the area of your site.

Now that we have the our rise or vertical from the contour map, we measure our length or adjacent on google maps. This can be done by right clicking and choosing measure at the bottom of the list.

We can either take a tape measure and measure the true length of the slope area or we use Pythagorean Theorem to find the length of the grassy area. Which is 23.4 Meters.

To find the elevation grade we take the Rise, vertical height and divide it by the run, horizontal measurement. Then times that decimal by 100%.
We can also figure out the total area which is the new length by the width of our site. Which is 920meters. Or 0.22 of an acre.
There is a fun quick math refresher for everyone. Again, don't worry if this is not something you will want to attempt to do. I just wanted to ensure everyone knew how to do it if they were interested.
Orchard Slope
My grade is an average of 17% (ranging from 15-20%),which is pretty steep. This means some equipment will have a difficult time moving around, so our crop management will need to be done with special consideration when it comes to choosing equipment, as only limited amounts can safely maneuver hills that steep.

On the flip side, trees will have better air and sunlight circulation. Which will be an added bonus. This also means if we choose not to do any excavation or Earth manipulations, they will need to be planted from East to West. Trees do prefer being planted from North to South and along contour lines for better sunlight exposure and water retention properties. But we will have a difficult time moving equipment sideways on that grade.
This observation allows us to better understand what we are working with, special considerations for managing in the future and what things we will expect to happen in the future. And if it is even possible as is, or if we will need to put in a lot of inputs to make it happen. For this site, it is possible to move forward, but we may have to bring in larger equipment for earth moving in the future.
Environmental
Now that we know the trees will be needed to be planted East to West. Let's look at environmental factors.
Sun exposure: To the North East of the area there tall pine trees. These will block very early morning sun. All other sides are fully exposed. Trees will get high amounts of South and Western Sun. Great for keeping them warm in the cold winter months, will need to ensure adequate mulching to hold moisture in the hot summer months.
Wind Exposure: Winds generally come in from the South and the East. Tall trees already growing on the East side will protect from easterly wind. South side of orchard will need generous wind break. Possibly High Bush Cranberries, Lilacs and Buffalo Berry that already grow here. Start those ASAP. Also consider this when deciding on row orientation and swales.
Soil Testing
Now for the big question. What is in my soil?
I could easily take some samples and send them off to a lab to see what is going on. In the future I might. But this year I wanted to do some home soil testing, plant observation and cover crops to test everything out.
First I went and collected soil from 3 different levels into jars for the jar soil test. While doing that I recorded the plants already growing there.
Plants that I recorded of significance:

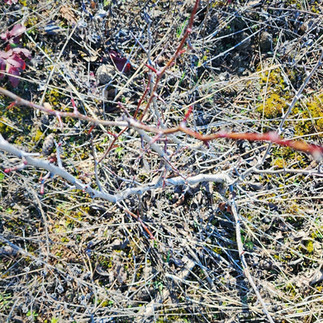


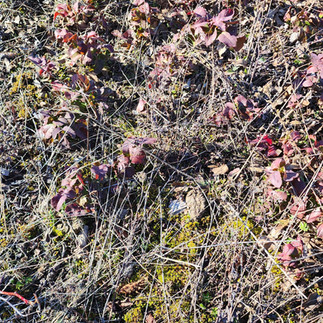
From Left to Right:
Saskatoon/Service Berry - This plant grows in well-drained, poor-quality, slightly acidic soil.
Cinquefoil - This plant grows in dry, nutrient-poor soil, often low in calcium and beneficial bacteria. This can also indicate high amounts of iron, potassium, phosphorus, magnesium, and sulfates.
Oregon Grape - Grows well in well-drained, low-nutrient soil that is slightly acidic.
These plants tell me a lot already. Before even testing anything, I am able to predict what the nutrients profile may be. This also means I have some work to do building up the nutrient content. BUT fruit tress do prefer well-drained, slightly acidic soil. Which is great news!
Next the Jar Soil test:
After collecting the soil, you add water, leaving some room at the top for shaking. Shake the jar vigorously until well mixed. Then leave it on the counter to separate. When I do this again, I will actually sift it. I was too lazy this time, but I don't believe my clay and silt levels were as accurate as they could have been, due to clumps of soil staying together at the bottom.
Once shaken at 1 minute the sand/rock layer will have settled.
After 2-3 hours the silt layers will have settled.
It will take another 24-48 hours for the clay to settle.


These tell me, pretty much what the plants did, it is rocky, sandy soil. The 3rd picture is from the jar where I was taking the nutrient samples from. It shows the silt layer the best because it was tipped on an angle.
Finally Nutrient Testing
This is an at home testing kit that I purchased. It comes with PH, Nitrogen, Potassium and Phosphorus.
For this test I grabbed a small amount of soil and added it to the PH, up to the level line then water to the next line. For the N, P, and K I had to add 5 parts water to 1 part soil and leave on the counter for 48 hours.

I forgot to take a photo of the pH, but it came back as slightly acidic.
As we can see above, there is a deficient to adequate amount of phosphorus, sufficient to surplus of potash (aka potassium), and no nitrogen.
The exciting part about the test results are that the plants were able to accurately help me predict the outcome of the soil, without any testing!! Which is pretty cool. This why I like to encourage plants as teachers and show that you can evaluate your own soil without any fancy tools and labs.
Would labs be more thorough and accurate? Sure. But if its not accessible to you there are other ways to see what is going on in your soil.
What's Next?
Now that I have observed, tested, and identified my grade, environmental considerations, and my soil type, it's time to get to work on making this into an orchard. If I had many, many acres, I would choose a different location. But on my less than 1 acre, this is what I have to work with.
So, for this year I am going to focus on soil enhancement and wind protection.
I have decided to plant a cover crop of:
Field Peas - Nitrogen Fixer (add nitrogen to soil from air). They also add Phosphorus, Potassium and Calcium. They grow quickly, creating a carpet that protects soil from erosion, builds carbon in soil and retains moisture.
Crimson Clover - Nitrogen Fixer, adding up to 150lbs of nitrogen per acre. They also add Phosphorus, Calcium, and Boron to soil. Are an excellent host for fungi, which increases beneficial bacteria and pollinators love it. Their deep tap root also creates 6"+ crumb soil to help with aeration. This is an annual clover in my region, meaning it won't spread to the neighbors either.
Barley - Deep root system that adds and balances carbon, increasing moisture retention. Adds Potassium and Silica to soil. Builds soil
Wind Protection - I chose to add Buffalo Berry, Lilac, Canadian Plum and High Bush Cranberries. These will offer wind protection while offering wildlife habitat, food, and soil enhancement. Plus they are shrubs that can grow well in low-nutrient sandy soil.
How the cover crop will work is, instead of harvesting for food, I will allow them to grow but cut or crimp them down after flowering, before the grain sets. Then, leave this to decompose over the year, essentially creating a 0.25-acre compost bin. By next year, if it is able to grow to its full capacity, I will have added up to 7 feet of carbon, aeration and microbiome below the surface, up to 0.5 inches of topsoil, and an abundance of nutrients, minerals, bacteria, and fungi. All for under $150 and a few hours of work, hopefully with little to no water inputs.


My husband decided he wanted to add a very small layer of soil on top for the seeds that didn't get planted deep enough. Now we leave it and all nature to do the work for me over time, versus me putting in an extraordinary amount of external inputs, I am not only saving myself time, energy, and money, but also allowing more insects, birds, and mammals to be reintroduced to the system as well. This planting took 20 minutes once we got started. My husband adding the small amount of top soil was an additional 1.5 hours.
Now we just need to hope for rain! These crops like moisture so not too much. Once they germinate they will only need the odd rainfall to continue growing. The forecast changed on me, of course, so we might actually have to water a couple times to give the seeds a head start. Everyone keep their fingers crossed for rain for me! It's funny because growing up in a family of hay farmers we were constantly checking the weather and stressing about if it was going to rain or not. Here I am, 18 years later back at it.
I am excited to continue updating, so please follow along as I go to see what ends up working and what doesn't!
Happy Gardening,
The Chronically Tired Gardener


Comments